We will build a stunning, awesome website using WordPress in this tutorial in just 20 minutes.
Just follow the steps below.
A note however, though. We are building a serious, professional website that will eventually get google ranking and attract lots of traffic. If you are expecting to build a free, cheap or amateur website see the other tutorials.
Step1: Register domain name and get a good hosting
We will host our website with SiteGround Web hosting.
Always choose the best hosting service for your websites.
Siteground is known for its super fast web servers, security features and awesome support.
This link takes you to the best hosting offer they have:
http://fastwebstart.com/go/siteground
Choose the hosting option with multiple websites feature:
![]()
![]()
![]()
![]()

You can add more websites to the same account by choosing that option.
Enter the domain name you have selected and make sure there is no spelling mistake!
![]()
![]()
![]()
![]()

Also remember to use a long, good password. Keep the password safely somewhere.
![]()
![]()
![]()
![]()

After completing the signup, wait for the email with login information to arrive in your email inbox.
![]()
![]()
![]()
![]()

Step 2: Install WordPress on your website
Once you have the email, login to your customer area:
![]()
![]()
![]()
![]()

![]()
![]()
![]()
![]()

Bookmark that page so that you can quickly login to your hosting control panel next time.
Click on ‘My Accounts’ tab:
![]()
![]()
![]()
![]()

You can see all important information about your website in the My Accounts tab. Clicking on the Control panel link will take you to the hosting control panel where you can do most of the website setup tasks like installing software, accessing logs and so on.
Click on the control panel link to go to the cPanel page.
![]()
![]()
![]()
![]()

In control panel, look for Softaculous under auto-installers and click the link.
![]()
![]()
![]()
![]()

Select WordPress and press ‘install’
![]()
![]()
![]()
![]()

Enter the details of your website.
![]()
![]()
![]()
![]()

Choose a long strong password for the admin account.
![]()
![]()
![]()
![]()

Press the install button to start the install process.
After the installation is complete, log in to your wordpress admin area.
![]()
![]()
![]()
![]()

![]()
![]()
![]()
![]()

Step 3: Customise your website
The next step is to customise the website to meet your needs. The first step would be to select a theme for your website.
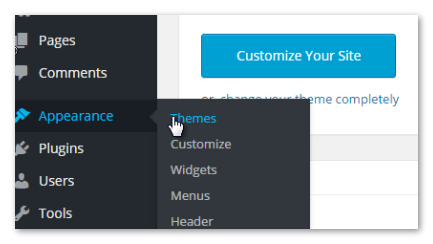
Select the menu item Appearance-> Themes to choose your wordpress theme.
![]()
![]()
![]()
![]()
You can select from already installed themes of install a new theme.
![]()
![]()
![]()
![]()

Review the URL structure of your posts
Go to the Settings-> permalinks menu item. This page allows you to set the URL structure of your posts.
![]()
![]()
![]()
![]()

You may want to change the deafult URL structure to something more interesting. I have selected a simple scheme: website.com/post-name/
![]()
![]()
![]()
![]()

The ‘category base’ is to alter the way category listing URLs are created. By default, the category listing URL will be
yourwebsite.com/category/category-name
for example,
veggso.com/category/soups
If you set a category base, then that word will be used instead of category.
For example:
if category base is ‘recipes’
veggso.com/recipes/soups
Same goes with tag base as well.
Add Categories
It is a nice idea to put your pages and posts into categories. This helps in organising the content and to create a nice navigation structure to your website as well.
Select the Posts->Categories Menu item
![]()
![]()
![]()
![]()

Then enter the category name.
![]()
![]()
![]()
![]()

‘slug’ is the URL freindly version of the category name. For example, if the category name is Veg Soups, you can enter the slug as veg-soups so that veggso.com/category/veg-soups/ will show all posts under veg soups category.
Create a Menu
Depending on the theme that you are using, there may be places to set menu in one or more places. In the twenty fifty theme that we are currently using for the veggso website, there is a menu just below the blog title/logo. To create a menu or to edit the existing menu, go to
Appearance->Menus menu item:
![]()
![]()
![]()
![]()

You can add a page, a category listing or a custom link to the menu:
![]()
![]()
![]()
![]()

Save the menu as the ‘primary menu’. You should be able to see the menu:
![]()
![]()
![]()
![]()

Create an ‘About’ Page
All website need an About page. People who got interested in your website would like to know more about you. To create a new page, select the Pages->Add New menu item:
![]()
![]()
![]()
![]()

Enter the page title and enter the contents of the pages. Add images too.
![]()
![]()
![]()
![]()

Now you can add the About page to the main menu of the website
![]()
![]()
![]()
![]()

We have setup the website and created a basic structure around it. It is just the beginning of your website success story!
Start posting to your website. Add awesome content and grab lots of traffic!
