Tables play an essential role in organising and presenting data. A table can enable you to organise complex data in a manner which is simple, logical and easy to follow.
This tutorial will show you how to use the HTML5 <table> tag. We’ll start from the basics, and get on to more advanced aspects. By the time you are through with this tutorial, you will be able to use tables in your webpages with ease.
Table structure
Before taking a look how to use tables in HTML, there are a few terms which you need to understand about tables in general. Take a look at this table:
![]()
![]()
![]()
![]()

Rows – the rows run horizontally from left to right. Our table above has four rows. Here is the table with the second row highlighted.
![]()
![]()
![]()
![]()

Columns – the columns run vertically from top to bottom. The table above has three columns. Here is the table with the third row highlighted.
![]()
![]()
![]()
![]()

Cells – the cells are the little boxes which make up the table. This is where you insert your data. Our table has 12 cells. Here is the table with the second cell in the first row selected.
![]()
![]()
![]()
![]()

Each of these components is represented by an HTML tag. That is what we shall look at next.
HTML5 Table
Table – the entire table is represented by the HTML5 table tag. This tag looks like this <table>. The <table> tag is a container tag – its purpose is to hold the other components of the tag. The <table> tag has a mandatory closing tag </table>.
Row – a single row is represented by the <tr> tag.
Column – a table column doesn’t have a specific tag. However, in case you need to control a specific column, there are certain Cascading Style Sheets (CSS) tricks which you can use. We shall look at this later.
Cell – a single cell is represented by either a <td> or <th> tag. A <td> tag (the “td” stands for “table data”) is used for inserting data into the table. A <th> tag (the “th” stands for “table header”) is used for inserting headings into the table. We shall look at table headers in detail later.
Creating A Table
Creating a table is a matter of bringing those tags together.
<table>
	<tr>
		<td> Title </td>
		<td> Price </td>
		<td> Available </td>
	</tr>
	<tr>
		<td> CSS Demystified </td>
		<td> $29 </td>
		<td> 16 </td>
	</tr>
	<tr>
		<td> Mastering JavaScript </td>
		<td> $35 </td>
		<td> 10 </td>
	</tr>
	<tr>
		<td> HTML5: An Introduction </td>
		<td> $15 </td>
		<td> 6 </td>
	</tr>
</table>
There are three key things you need to note here:
1. The table begins and ends with the <table> tag. This is what indicates to the browser to insert the table.
2. Each row in the table is represented by the <tr> tag. In fact, creating a table is often a matter of stacking different rows, one on top of another.
3. Each cell in the table is represented by the <td> tag. The contents of each cell is typed between the opening and closing <td> tag.
The code above displays a table like this:
![]()
![]()
![]()
![]()

Table Borders
You have obviously noted that our table doesn’t have borders. Now, to insert the borders, we have to turn to CSS.
To give our table a border, let us set its attributes using CSS. Here is a simple CSS code for setting the table border.
table{
	border: 2px solid #774F38;
}
This gives our table a border which is 2 pixels thick, black in color, and composed of a continuous line. With this css styling, our table now looks like this:
![]()
![]()
![]()
![]()
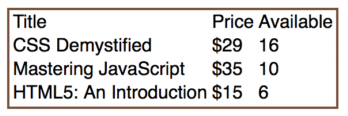
You were probably expecting to see a border around all the cells!
CSS styling applied to the <table> tag only affects the table, it doesn’t affect the cells. If you want to style the cells, you need to apply your styling to the <td> tag.
Therefore, to give each of the cells a border which is blue, 1 pixel thick and made of a solid line, we add the following rule to the CSS:
td {
	border: 1px solid #FA6900;
}
Our table now looks like this:
![]()
![]()
![]()
![]()

Collapsing the Border
You might have noticed the tiny spaces between each of the cells. To remove the spaces, you have to “collapse” the border. You can do this by adding the “border-collapse” attribute to the table in css:
table{
	border: 2px solid #774F38;
	border-collapse: collapse;
}
Our table now looks like this:
![]()
![]()
![]()
![]()

Padding
Our table looks a little cramped. It would be nice if the text had breathing space (i.e. space between the text in the cells and the borders). We apply padding to the <td>, as follows:
 td {
	padding: 5px 10px;
}
This adds a space of 5 pixels to the top and bottom of the text, and 10 pixels to the left and right of the text. Our table now looks like this:
![]()
![]()
![]()
![]()

Regions in a table
HTML5 introduced a way of segregating a table into regions: the head, body and foot. These regions are represented by the following tags:
<thead> – is the head of the table. This area usually contains the column headings
<tbody> – is the body of the table. The table data.
<tfoot> – is the foot of the table. The summary, other footer information goes here
![]()
![]()
![]()
![]()

The <thead> and <tfoot> areas are given different colors using the following CSS code:
     thead
      {
        background-color: #F1D4AF;
      }
      tfoot
      {
        background-color: #C5E0DC;
      }
Here is the whole table code:
<table>
   <thead>
    <tr>
        <th> Title </th>
        <th> Price </th>
        <th> Available </th>
    </tr>
  </thead>
  <tbody>
    <tr>
        <td> CSS Demystified </td>
        <td> $29 </td>
        <td> 16 </td>
    </tr>
    <tr>
        <td> Mastering JavaScript </td>
        <td> $35 </td>
        <td> 10 </td>
    </tr>
    <tr>
        <td> HTML5: An Introduction </td>
        <td> $15 </td>
        <td> 6 </td>
    </tr>
  </tbody>
  <tfoot>
    <tr>
        <td> Total </td>
        <td></td>
        <td> 32 </td>
    </tr>
  </tfoot>
</table>
![]()
![]()
![]()
![]()

<th> tag
The th tag for heading cells
Notice the <th> tag in the sample code above. The th tag is used to mark the heading of the row/column.
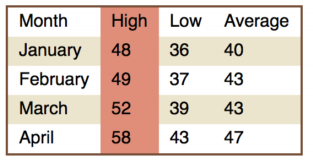
Merging Cells
It is possible to merge multiple cells in to one. You do this by combining the cells into one cell.
See this table for example:
![]()
![]()
![]()
![]()

You can notice that the all the cells in the first row have been merged into a single cell. Also, the cells representing the average temperatures of February and March have been merged.
Merging columns
To merge different cells on a given row, you use the “colspan” attribute of the
<tr>
<td colspan="4">
Temperature Distribution In Jan – Apr 2015
</td>
</tr>
Merging Rows
In order to merge two or more cells in the same column, you use the “rowspan” attribute. This attribute is similar to the colspan, except that it applies to rows. For instance, the average temperatures of February and March are merged as follows:
<tr>
	<td> February </td>
	<td> 49 </td>
	<td> 37 </td>
	<td rowspan="2"> 43 </td>
</tr>
<tr>
	<td> March </td>
	<td> 52 </td>
	<td> 39 </td>

</tr>
Table Caption
In the example above, we used a single row to explain the purpose of the table. It is possible to add a caption to the table, which will be more semantically right.
<table>
<caption>
Temperature Distribution In Jan – Apr 2015 (<sup>o</sup>F)
</caption>
<tr>
	<td> Month </td>
	<td> High </td>
	<td> Low </td>
	<td> Average </td>
</tr>
<tr>
	<td> January </td>
	<td> 48 </td>
	<td> 36 </td>
	<td> 40 </td>
</tr>
<tr>
	<td> February </td>
	<td> 49 </td>
	<td> 37 </td>
	<td rowspan="2"> 43 </td>
</tr>
<tr>
	<td> March </td>
	<td> 52 </td>
	<td> 39 </td>

</tr>
<tr>
	<td> April </td>
	<td> 58 </td>
	<td> 43 </td>
	<td> 47 </td>
</tr>
</table>
Apply background color to certain rows/columns
When you want to give a different background color to alternative rows, you can use the nth-child pseudo class.
See the example below:
tr:nth-child(even)
      {
        background-color:#ECE5CE;
      }
Results in this:
![]()
![]()
![]()
![]()

Similarly, we can select the second column:
td:nth-child(2)
      {
        background-color:#E08E79;
      }
and that results in this:
![]()
![]()
![]()
![]()
Reference
Related Posts
How to add blank space in HTML – examples and sample code
Changing Text Color in HTML – Sample code
The HTML iframe Tag Reference, Sample Code & Techniques
HTML5 doctype declaration, sample Template and Examples
How to create a horizontal line in HTML
How to make an HTML Image Link
The tag for HTML text color
How to set background image in HTML
